How to Make Coasters
To make DIY coasters, cut absorbent or heat-safe material into squares or circles, smooth the edges, and add a non-slip backing. Choose a finish that suits the material and let it dry fully before use.
On this page (7 sections)
- How do you make homemade coasters step by step?
- What materials work for simple DIY coasters?
- How do you make DIY coasters that protect a table?
- Which supplies do you need to make coasters at home?
- What can go wrong when making homemade coasters?
- Which ready-made coasters fit different table styles?
- How do you finish a dining table to match your coasters?
To make DIY coasters, cut cork, tile, fabric, or wood into drink-sized pieces, smooth the edges, and add a backing that helps keep them from sliding. Let glue, paint, or sealant dry fully before using a coaster on your table.
The simplest homemade coasters use pre-cut tiles or cork squares. More involved projects can use fabric, wood, or resin, depending on the look and tools you have.
How do you make homemade coasters step by step?
Cut the coaster shape, finish the surface, and add a non-slip backing. Start with one sample so you can check the size and grip before making a full set.
- Choose a material and a shape, such as a square or circle.
- Measure and mark pieces to fit the base of your everyday cups.
- Cut or trim the pieces, then smooth any rough edges.
- Add decoration or a finish that suits the material.
- Attach cork, felt, or another suitable backing.
- Let each layer dry or cure according to its directions.
Keep the work surface protected while cutting or gluing. Use scissors for fabric and a tool suited to the material for harder pieces, following its safety instructions.
What materials work for simple DIY coasters?
Cork and ceramic tile are easy starting points because they come in flat pieces that need little shaping. Fabric and wood offer more room for color or texture, but usually need extra finishing.
| Material | Good fit | What to consider |
|---|---|---|
| Cork | A simple, lightweight coaster | Cut cleanly and add decoration if desired |
| Ceramic tile | A firm, easy-to-wipe surface | Add a backing so the tile doesn't scratch or slide |
| Fabric | A soft, washable-looking finish | Use layers or a firm base to help it hold its shape |
| Wood | A natural look | Smooth edges and protect the surface from moisture |
| Resin | Decorative designs and embedded details | Follow product directions for mixing, curing, and ventilation |
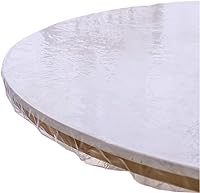
For projects that need table protection beyond individual drinks, a tablecloth can cover more of the dining surface. A best round tablecloth with elastic edge can also help cover a round table.
How do you make coasters from tile?
Add a backing to a clean tile, then decorate or seal it if needed. Choose a tile with a flat underside and attach a piece of cork or felt cut to the same size.
Wipe dust from the tile before attaching anything. If you paint or seal the top, use products suited to tile and allow the finish to dry fully before setting down a cup.
How do you make coasters from fabric?
Layer fabric over a firm base or sew several layers together so the coaster keeps its shape. Trim loose threads and add a backing if the finished piece might slide.
Cotton fabric can be a useful way to use up scraps. Check the fabric's care needs before making a set, especially if you expect to wash the coasters.
How do you make DIY coasters that protect a table?
Use a stable base, a surface that handles the drinks you serve, and a backing that won't scratch the table. A coaster should sit flat and catch moisture rather than let it run onto the tabletop.
Smooth or cover rough edges on wood and tile. If you add paint, glue, or a clear finish, give it the full drying or curing time in its directions.
For extra coverage on a table, a best fitted oval tablecloth with elastic may suit an oval shape. For a seasonal table, see how to make a Christmas table runner.
Which supplies do you need to make coasters at home?
Gather your material, a ruler, a pencil, cutting tools, adhesive, and backing before you start. The exact supplies depend on whether you're working with fabric, tile, wood, or resin.
A basic cork or tile project may need only pre-cut pieces, scissors or a suitable cutter, and adhesive. For resin, use the product's directions for protective gear, workspace setup, mixing, and curing.
If you'd rather make a more decorative resin project, follow our guide to how to make resin photo coasters. A best wood and resin coasters guide can help if you want to compare finished options.
What can go wrong when making homemade coasters?
Most problems come from uneven edges, weak backing, or using a finish before it has dried. Test one coaster with a cup and a small amount of condensation before putting a new set into regular use.
If a coaster rocks, sand or trim the uneven edge where appropriate. If the backing peels, remove it and choose an adhesive that suits both materials.
Don't use a decorative coating that isn't meant for the surface or allow wet glue to touch your table. Let every layer dry on a protected surface.
Can you use homemade coasters outdoors?
Yes, if the materials and finish suit the setting, but bring them indoors when not in use. Sun, rain, and damp conditions can affect fabric, wood, and adhesive over time.
For outdoor dining, protect chairs with best outdoor dining chair covers. If you're sewing, a dining chair cover pattern can help with a matching project.
Which ready-made coasters fit different table styles?
Choose a ready-made set if you want a coordinated look without cutting, gluing, or curing materials. The right choice depends on whether you prefer a simple round shape, a decorative motif, or a wood-and-resin finish.
The AVOCRAFTS set includes 6 round cedar wood and epoxy resin coasters with a black metal holder. Each coaster measures 4 x 4 inches.
The Huray Rayho set includes 6 hexagonal acacia wood coasters with bee and honeycomb patterns filled with yellow resin. Each piece is about 3.9 inches wide by 3.3 inches tall.
The Loongresinwood set includes 6 round blue wood and resin coasters with a matching holder. Each measures about 3.7 inches across and 0.4 inches thick.
How do you finish a dining table to match your coasters?
Repeat one color or material across a few table details to make homemade coasters feel connected to the rest of the setting. Keep the arrangement simple so drinks have a clear place to land.
A wood coaster can pair with a natural table runner, while fabric coasters can echo napkins or a tablecloth. For holiday decor above the table, see christmas chandelier diy.
Pick cork or tile if you want a short, simple project. Choose fabric or wood when you want more control over color and shape, and use resin when you're ready to follow a more detailed process.
Frequently asked questions
What is the easiest way to make homemade coasters?
Use pre-cut cork tiles or ceramic tiles, then add a fabric or cork backing and seal the top if the material needs it. Cut backing to fit, attach it with an adhesive suited to both surfaces, and let the coaster cure or dry as directed before setting down a drink.
What materials can I use to make DIY coasters?
Cork, ceramic tile, wood, fabric, and resin are common coaster materials. Choose a surface that suits the drinks you serve, add a backing that grips the table, and check that any paint, glue, or finish is fully dry before use.
How do I make coasters waterproof?
Use a finish labeled for the material and follow its directions for coats and curing time. A coating can help resist moisture, but it won't make every coaster fully waterproof; keep liquid from sitting on unfinished edges and wipe spills promptly.
How big should homemade coasters be?
Make each coaster wide enough for the base of your usual cups and glasses, with a little room around the edges. A 4-inch square or circle is a practical starting point for many mugs, but measure your drinkware before cutting a batch.